Monday, November 2, 2009

Customizing authorization in ASP.NET MVC

I've seen, and answered, a few questions on StackOverflow about specific authorization scenarios that fall outside the bounds of what the standard AuthorizeAttribute can handle. I've run into a couple of different situations where I've needed to do this with my own apps as well. One specific case is where you have a relationship between the entity being referred to by the controller action and the user. In this case, the user is the owner of the data and should have rights regardless of their role relationship with the data. To allow access under these circumstances, I extended the AuthorizeAttribute, creating a RoleOrOwnerAuthorizationAttribute class that takes this ownership relation into account. I use this attribute to control access to the user's own data (stored in my user table).

Pre-requisites


In order for this attribute to work it needs a few things. First, it needs to know what parameter in the route data corresponds with the id found in the table we are looking at. Second, it needs a way to access your database to find if there is a row that matches both the username of the current user and the id specified in the request. For the former, I use a property on the class that defaults to the string "id". For the latter, I use a ContextFactory which is constructor-injected, but defaults to a factory for the app's data context.

How it works


Derive from AuthorizeAttribute

The class derives from AuthorizeAttribute. I do apply a different set of AttributeUsage properties to the class as I don't want to support multiple instances of this method. Note that you can use it in conjunction with the standard AuthorizeAttribute and achieve similar effects where you scope the class at one authorization level and narrow it down. You need to be careful, though, as class-level attributes may prevent this attribute from allowing owner access. Note that it also doesn't make sense to apply this attribute at the class level itself since it requires a specific id parameter for each method.

[AttributeUsage( AttributeTargets.Method, Inherited = true, AllowMultiple = false )]
public class RoleOrOwnerAuthorizationAttribute : AuthorizeAttribute
{
private string routeParameter = "id";
/// <summary>
/// The name of the routing parameter to use to identify the owner of the data (participant id) in question. Default is "id".
/// </summary>
public string RouteParameter
{
get { return this.routeParameter; }
set { this.routeParameter = value; }
}

...
}

Constructor Injection


For the factory implementation and to allow easier unit testing I use constructor injection with a default instance.

public RoleOrOwnerAuthorizationAttribute()
: this( null )
{
}

public RoleOrOwnerAuthorizationAttribute( IDataContextFactory factory )
{
this.ContextFactory = factory ?? new MyDataContextFactory();
}

The IDataContextFactory actually produces a DataContextWrapper, which I wrote about earlier when discussing how to mock and fake the LINQtoSQL data context.

public interface IDataContextFactory
{
IDataContextWrapper GetDataContextWrapper();
}

public class MyDataContextFactory : IDataContextFactory
{
public virtual IDataContextWrapper GetDataContextWrapper()
{
return new DataContextWrapper<MyDataContext>();
}
}

Override OnAuthorization


Note I've refactored some code from the original AuthorizeAttribute that will be used when handling caching. The original attribute doesn't provide a mechanism to tie into this code directly so I've provided an implementation that is used when overriding OnAuthorization so that caching is handled properly. This code is copied almost verbatim from the AuthorizeAttribute -- it would be nice if they'd refactor so I could simply use it.


protected void CacheValidateHandler( HttpContext context, object data, ref HttpValidationStatus validationStatus )
{
validationStatus = OnCacheAuthorization( new HttpContextWrapper( context ) );
}

protected void SetCachePolicy( AuthorizationContext filterContext )
{
// ** IMPORTANT **
// Since we're performing authorization at the action level, the authorization code runs
// after the output caching module. In the worst case this could allow an authorized user
// to cause the page to be cached, then an unauthorized user would later be served the
// cached page. We work around this by telling proxies not to cache the sensitive page,
// then we hook our custom authorization code into the caching mechanism so that we have
// the final say on whether a page should be served from the cache.
HttpCachePolicyBase cachePolicy = filterContext.HttpContext.Response.Cache;
cachePolicy.SetProxyMaxAge( new TimeSpan( 0 ) );
cachePolicy.AddValidationCallback( CacheValidateHandler, null /* data */);
}

Now, all that remains is to provide the implementation. The implementation first runs AuthorizeCore from the parent class. If it succeeds, then we don't need to check for ownership. It then checks if the user is authenticated, if not, we return a redirect to the login page. Finally it checks if the user is the owner of the related data. If that succeeds, we continue on, otherwise we deliver an error message to the user. This latter is unlike the normal AuthorizeAttribute, which would redirect to the login page. In this case, though, the user is authenticated and simply does not have enough privilege.

public override void OnAuthorization( AuthorizationContext filterContext )
{
if (filterContext == null)
{
throw new ArgumentNullException( "filterContext" );
}

if (AuthorizeCore( filterContext.HttpContext ))
{
SetCachePolicy( filterContext );
}
else if (!filterContext.HttpContext.User.Identity.IsAuthenticated)
{
// auth failed, redirect to login page
filterContext.Result = new HttpUnauthorizedResult();
}
else if (IsOwner( filterContext ))
{
SetCachePolicy( filterContext );
}
else
{
ViewDataDictionary viewData = new ViewDataDictionary();
viewData.Add( "Message", "You do not have sufficient privileges for this operation." );
filterContext.Result = new ViewResult { ViewName = "Error", ViewData = viewData };
}

}

private bool IsOwner( AuthorizationContext filterContext )
{
using (IAuditableDataContextWrapper dc = this.ContextFactory.GetDataContextWrapper())
{
int id = -1;
if (filterContext.RouteData.Values.ContainsKey( this.RouteParameter ))
{
id = Convert.ToInt32( filterContext.RouteData.Values[this.RouteParameter] );
}

string userName = filterContext.HttpContext.User.Identity.Name;

return dc.Table<Users>().Where( u => u.UserName == userName && u.UserID == id ).Any();
}
}

Usage


Now we have an attribute that allows the user or anyone in a suitable role to have access to a controller action based on the current user and the routing parameter used to specify which user's data should be operated on.

[RoleOrOwnerAuthorization( Roles = "Admin", RouteParameter = "userID" )]
public ActionResult UpdateContact( int userID )
{
...
}
Thursday, October 1, 2009

Mocking the HtmlHelper class with Rhino.Mocks

In developing HtmlHelper extensions, it's very useful to be able to pass in a mock HtmlHelper. It's not particularly difficult, though I spent a fair amount of time trying to get the Response method, ApplyAppPathModifier to properly return a correct path based on it's value. I finally gave up and decided to simply mock it out by allowing you to supply the path you want it to return via parameters. The current version only works with simple paths of the form /controller/action/id since that's all I needed. Here's the code I'm using to mock out the HtmlHelper for my extensions tests. Add it to your static mocks class.

public static HtmlHelper CreateMockHelper( string routeController,
string routeAction,
object routeID )
{
RouteData routeData = new RouteData();
routeData.Values["controller"] = routeController;
routeData.Values["action"] = routeAction;
routeData.Values["id"] = routeID;

var httpContext = MockRepository.GenerateStub<HttpContextBase>();
var viewContext = MockRepository.GenerateStub<ViewContext>();
var httpRequest = MockRepository.GenerateStub<HttpRequestBase>();
var httpResponse = MockRepository.GenerateStub<HttpResponseBase>();

httpContext.Stub( c => c.Request ).Return( httpRequest ).Repeat.Any();
httpContext.Stub( c => c.Response ).Return( httpResponse ).Repeat.Any();
httpResponse.Stub( r => r.ApplyAppPathModifier( Arg<string>.Is.Anything ) )
.Return( string.Format( "/{0}/{1}/{2}", routeController, routeAction, routeID ) );

viewContext.HttpContext = httpContext;
viewContext.RequestContext = new RequestContext( httpContext, routeData );
viewContext.RouteData = routeData;
viewContext.ViewData = new ViewDataDictionary();
viewContext.ViewData.Model = null;

var helper = new HtmlHelper( viewContext, new ViewPage() );
if (helper.RouteCollection.Count == 0)
{
helper.RouteCollection.MapRoute(
"Default", // Route name
"{controller}/{action}/{id}", // URL with parameters
new { controller = "Home", action = "Index", id = "" } // Parameter defaults
);
}
return helper;
}

Wednesday, August 12, 2009

jQuery Theme Manager Plugin

Inspired by this question on Stack Overflow, I decided to make a jQuery plug-in to handle switching themes on a web site that I'm working on. I based the plugin on the code referenced in the question which is by James Padolsey. One of the requirements for the plugin is that it should work with a variety of different elements. I'm using it with a select, but I believe it would work with anchors and hidden inputs as it only depends on the name of the style sheet being located either in an href attribute or the value of the element. For select elements it relies on the value.

The plugin handles two different types of event triggers. If you are using a select, it will trigger on the change event. If you are using something else, it will trigger on the click event. To handle the case outlined in the question, I'd set up the style sheets choices using hidden inputs. I'd then add a click handler for each of these and have an interval timer that rotates among the hidden inputs, triggering the click event on the input corresponding with the current style. I haven't actually tried it, but I'm pretty sure it will work. :-)

The plugin assumes that you can switch styles by simply changing the url of a single stylesheet. If your theme isn't contained in a single stylesheet, you'll have to adapt the code to get it to work for you. The plugin is reasonably configurable. If you supply a loadingImg (full or relative url), it will use the Fade effect, otherwise it will use the Slide effect. I prefer the slide effect as it seems to work better when the stylesheet loads quickly.

Options and Defaults

loadingImg: null
No image will be shown. Supply an absolute or relative url (to the page) if you want a loading image. If this is non-null a Fade effect will be used for the overlay, otherwise a Slide effect is used.
bgColor: 'black'
This can be a hex value '#000' or a name, as shown
overlayID: 'reThemeOverlay'
The name of the overlay DIV, don't reuse an existing one
baseUrl: '/content/styles'
The CSS files supplied in the selector will be relative to this
styleSheet: 'theme'
The id of the stylesheet that will be replaced.
zIndex: 32767
The relative position in the z plane for the overlay. This needs to be large enough so that it covers all of the rest of the elements on the page.
speed: 'slow'
You can use any value available to the fadeIn/Out or slideIn/Out methods
delay: 0
This is the number of milliseconds you want plugin to wait after it thinks the stylesheet has been loaded before it begins the reveal. When combined with the speed parameter, setting this can improve the animation effect.

The plugin uses a simple heuristic to determine when the new stylesheet has been loaded. After the overlay has been applied, it first sets the href property of the stylesheet with the new url (note: if the name you supply doesn't end in .css, the extension will be supplied). Then it loads the stylesheet using an AJAX get request, with the reveal code executed by the callback on the get. Once the get completes -- presumably the other request has completed as well and the styles have been updated -- it then triggers the reveal after delaying for the specified amount of time.

Example Usage


<% var theme = ViewData["theme"] as string;
if (theme.IsNothing())
{
theme = "smoothness/jquery-ui-theme";
} %>

<script type="text/javascript">
$(function() {
$('#themeSelector')
.find('option')
.each( function() {
var $this = $(this);
if ($this.val() == '<%= theme %>') {
$this.attr('selected','selected');
}
});

$('#themeSelector').retheme({
baseUrl: '<%= Url.Content( "~/Content/styles/themes" ) %>',
wait: 1000
}).change( function() {
$.post( '<%= Url.Action( "SetTheme", "Participant" ) %>', { theme: $(this).val() }, function(data) {
if (!data.Status) {
alert('Failed to update preferences');
}
}, 'json');
});

$('#themeUI').show();
});
</script>

<div id="themeUI" style="position: absolute; right: 0px; margin-right: 5px; top: 0px; margin-top: 5px; display: none;">
<label for="themeSelector">Theme:</label>
<select id="themeSelector">
<option value="cupertino/jquery-ui-theme">Cupertino</option>
<option value="overcast/jquery-ui-theme">Overcast</option>
<option value="peppergrinder/jquery-ui-theme">Pepper Grinder</option>
<option value="smoothness/jquery-ui-theme">Smoothness (default)</option>
<option value="southstreet/jquery-ui-theme">South Street</option>
<option value="ui-darkness/jquery-ui-theme">UI Darkness</option>
<option value="vader/jquery-ui-theme">Vader</option>
</select>
</div>

Code


;(function($) {

$.fn.extend({
retheme: function(options,callback) {
options = $.extend( {}, $.Retheme.defaults, options );

if (options.loadingImg) {
var preLoad = new Image();
preLoad.src = options.loadingImg;
}

this.each(function() {
new $.Retheme(this,options,callback);
});
return this;
}
});

$.Retheme = function( ctl, options, callback ) {
if (options.styleSheet.match(/^\w/)) {
options.styleSheet = '#' + options.styleSheet;
}
$(ctl).filter('select').change( function() {
loadTheme( themeSelector(this), options );
if (callback) callback.apply(this);
return false;
});
$(ctl).filter(':not(select)').click( function() {
loadTheme( themeSelector(this), options );
if (callback) callback.apply(this);
return false;
});
};

function themeSelector(ctl) {
var $this = $(ctl);
var theme = $this.attr('href');
if (!theme) {
theme = $this.val();
}
return theme;
}

function loadTheme( theme, options ) {
var themeHref = options.baseUrl + '/' + theme;
if (!themeHref.match(/\.css$/)) {
themeHref += '.css';
}

var styleSheet = $(options.styleSheet);
var counter = options.maxTries;
var bg = options.bgColor;
if (options.loadingImg) {
bg += ' url(' + options.loadingImg + ') no-repeat center';
}
var speed = options.speed;
var delay = options.delay;

var $body = $('body');
var overlay = $('<div id="' + options.overlayID + '"></div>').appendTo($body);
$body.css( { height: '100%' } );
overlay.css({
display: 'none',
position: 'absolute',
top:0,
left: 0,
width: '100%',
height: '100%',
zIndex: options.zIndex,
background: bg
})
.stop( true );

if (options.loadingImg) {
overlay.fadeIn( speed, function() {
styleSheet.attr( 'href', themeHref );
$.get( themeHref, function() { // basically load it twice, but that will make sure it's been applied before we reveal
setTimeout( function() {
overlay.fadeOut( speed, function() {
$(this).remove();
});
}, delay );
});
});
}
else {
overlay.slideDown( speed, function() {
styleSheet.attr( 'href', themeHref );
$.get( themeHref, function() { // basically load it twice, but that will make sure it's been applied before we reveal
setTimeout( function() {
overlay.slideUp( speed, function() {
$(this).remove();
});
}, delay );
});
});
}
};

$.Retheme.defaults = {
loadingImg: null,
bgColor: 'black',
overlayID: 'reThemeOverlay',
baseUrl: '/content/styles',
styleSheet: 'theme',
zIndex: 32767,
speed: 'slow',
delay: 0
};

})(jQuery);

Demo


A simple demo that uses both a select element and buttons to choose themes can be found at http://myweb.uiowa.edu/timv/retheme-demo.

Fixed


  • Added a callback parameter so you can execute your own code after the theme has been loaded. Note that
    the callback will be invoked prior to the reveal animation.

  • The plugin now prevents the default action associated with the trigger element. If you want the default action to be taken, you'll need to reapply it via the callback mechanism.


To Do


  • I'd like to refactor the reveal code so that I don't have to repeat it for the different effects. I think I'd have to figure out the different animation parameters for each effect and set them up, but I'm too lazy to do that for now.

  • Fix the hand-coded style of the select control and apply it as a class. This was just for a proof-of-concept, but it should be refactored.

Tuesday, July 7, 2009

How nerdy are you?

I was watching a videos series with our Bible study the other night on the topic of historical revisionism. As an example of how meaning does not arise ex nihilo (out of nothing), but is informed by our historical experiences, the lecturer showed a series of numbers and asked what they meant. One sequence began with "1" -- everyone in the video, and in my head, I too said "that's the number one." The next number in the sequence was "11" -- of which I thought, that's 3.

That would make me nerdy; I know that there are only 10 kinds of people in the world. I'm in the set that understands binary.

That wasn't really the "trick" of the sequence. The sequence ended with "911" -- which everyone identified as "9-1-1", not "nine hundred eleven" and "9/11", both of which have a completely different meaning than they did only a few years ago.

Thursday, June 11, 2009

Collapsible tables: handling ranges of elments with jQuery

In the past week or so I've answered a couple of questions on StackOverflow about how to handle operations ranges of elements before/after a particular element. One recent question had to do with collapsible tables and I thought I'd share my answer to that question as general technique for this type of operation.

The basic idea is that you have a series of elements that you want to do something with within a larger series of similar elements. For example, you have a table consisting of some rows that are "headers" and some that are "row". You want to be able to operate on the sub-range without applying the same operations to the entire range or elements outside the subrange.

One way to do this is to use classes to mark your elements with context. Then use the each method, with prevAll and nextAll operations on the given element to iterate through the range of elements, performing the desired operation until you come to an element that has a class (context) that marks the end of the range.

For example, consider the following table:

<table>
<tr class='header'><th>header 1</th></tr>
<tr class='row'><td>row 1-1</td></tr>
<tr class='row'><td>row 1-2</td></tr>
<tr class='row'><td>row 1-3</td></tr>
<tr class='header'><th>header 2</th></tr>
<tr class='row'><td>row 2-1</td></tr>
<tr class='row'><td>row 2-2</td></tr>
<tr class='row'><td>row 2-3</td></tr>
<tr class='header'><th>header 3</th></tr>
<tr class='row'><td>row 3-1</td></tr>
<tr class='row'><td>row 3-2</td></tr>
<tr class='row'><td>row 3-3</td></tr>
</table>


When you click on a row, you want all the rows in the local range (between the headers) to collapse. When you click on a header (for a collapsed set of rows) you want it to re-expand.

To accomplish this, create a click handler for the rows with class row, that hides itself and both the previous and next rows until it encounters a row with class header


$('table tr.row').click( function() {
$(this).hide();
$(this).prevAll('tr').each( function() {
if ($(this).hasClass('header')) {
return false;
}
$(this).hide();
});
$(this).nextAll('tr').each( function() {
if ($(this).hasClass('header')) {
return false;
}
$(this).hide();
});
});


And to re-expand the collapsed rows, create a click handler for the rows with class header, that iterates through the next row siblings of the header, showing each row until it encounters another row with class header


$('table tr.header').click( function() {
$(this).nextAll('tr').each( function() {
if ($(this).hasClass('header')) {
return false;
}
$(this).show();
});
});

Saturday, May 16, 2009

Client-side session termination

One of the most annoying things about session timeout, especially in a web site that uses AJAX, is that often the user is unaware of it. They come back to their computer after an extended time away, the page is right there as they left it, but when they start interacting with it, it exhibits strange behavior. "Why is the login page showing up where my report ought to be?" Or "Where did my data go? I just clicked the sort by name column and all of my data disappeared."

Of course, we developers know what happened. Our AJAX code got caught in the authentication/authorization trap because the session expired. The automatic methods we've set up to prevent unauthenticated users from accessing our site worked too well and the AJAX request got redirected as well.

Rather than build session awareness into all of my AJAX code, I've decided to take a different tack. I've created a jQuery plugin that works client-side to warn the user that their session is about to expire and, absent a confirmation to continue the session, redirects the user to the logout action of my MVC web site to formally end the session.

Requirements

I had a few requirements for my plugin. First, it needed to work with jQuery, obviously. In fact I had some existing non-jQuery code that I converted to a jQuery plugin. I did this partly as a learning experience in developing jQuery plugins and partly because I wanted to declutter the global javascript scope. It also reduces the complexity of my master page as I moved the code to its own javascript file (it's an intranet application so I'm not particularly concerned about adding to the number of requests being made).

Second, I wanted the plugin to use a dialog to inform the user of the imminent expiration of their session and allow them to continue it if they wanted or end it immediately. To this end, the plugin requires that the developer supply a URL that can be accessed to continue the session and another that will end the session: refreshUrl and logoutUrl. In my use I picked an existing lightweight page as the refresh url, though you could create a separate action. I use sliding windows so any request to the server will reset the server-side session timer so this worked for me. If your requirements are more complex a separate action may be preferable. For the logout, I used the same logout action that's connected to the logout button. Additional data can be added to the URLs by appending query parameters. The plugin only supports the GET method at this time.

Since I'm already using jQuery UI, my plugin relies on the jQuery UI Dialog widget. To this end the plugin requires that you have an element on the page that will function as the prompt dialog. The plugin is actually chained off this element. It will add OK and Logoutbuttons to the dialog.

Third, I wanted the session timeout and dialog wait times to be configurable so that I could supply actual timeout values from the real session via ViewData. I decided to provide sensible, for me, defaults based on the default ASP.NET session timeout of 18 minutes and 1.5 minutes, respectively. That is, the dialog will pop up after 18 minutes of "inactivity" and after an additional 1.5 minutes of "inactivity" the logout action will be invoked.

Since the default timeout for an ASP.NET session is 20 minutes, this means that the client-side will terminate the session 30 seconds before the server-side. This prevents the logout action itself from being redirected to the logon page. Strange things can happen if you're not careful about this. You don't want the redirection to end up with the logon page redirecting back to the logout action as can happen if your logout action requires authentication. This is a strictly a problem for my plugin, but I decided to avoid the potential complication by ending the session early. Developers need to be aware that whatever value you they supply for the timeouts will be adjusted so that the actual invocation of the timeout will occur 30 seconds prior to the supplied session timeout value.

Lastly, I wanted the plugin to restart its timers on any interaction with the server, rather than on client-side interaction. I decided that it was too much overhead and additional complexity to reset the timers on client-side interaction. To do so I would have to detect all events on the page and periodically "phone home" to ensure that the server side session was refreshed. I did, however, want to reset the timers on AJAX interactivity so the plugin inserts some default behavior into the ajaxStart chain that does this.

Implementation

I use the jQuery autocomplete plugin as my implementation template. I felt that it provided a clean and easy to understand implementation. Below is my current code with a sample implementation.

/*
* Autologout - jQuery plugin 0.1
*
* Copyright (c) 2009 Tim Van Fosson
*
* Dependencies: jQuery 1.3.2, jQuery UI 1.7.1, bgiframe (by default)
*
*/

;(function($) {

$.fn.extend({
autologout: function(refreshUrl, logoutUrl, options) {
options = $.extend( {}, $.Autologout.defaults, options );

this.each(function() {
new $.Autologout(this, refreshUrl, logoutUrl, options);
return false;
});
return;
}
});

$.Autologout = function( prompt, refreshUrl, logoutUrl, options ) {
var logoutTimer = null;
var sessionTimer = null;
var dialogWait = Math.max( 0, Number( options.sessionDialogWait * 60000 ) );
var timeout = Math.max( 30000, (Number(options.sessionTimeout) * 60000) - dialogWait) - 30000;

$(prompt).dialog( {
autoOpen: false,
bgiframe: options.bgiframe,
modal: true,
buttons: {
OK: function() {
$(this).dialog('close');
$.get( refreshUrl, resetTimers, 'html' );
},
Logout: sessionExpired
},
open: function() {
if (options.pageSelector) {
var height = $(options.pageSelector).outerHeight();
$('.ui-widget-overlay').animate( { 'height' : height }, 'fast' );
}
}
}).ajaxStart( function() { resetTimers(); } );

resetTimers();

function resetTimers()
{
if (logoutTimer) clearTimeout(logoutTimer);
if (sessionTimer) clearTimeout(sessionTimer);

sessionTimer = setTimeout( sessionExpiring, timeout );
}

function sessionExpiring()
{
logoutTimer = setTimeout( sessionExpired, dialogWait );
$(prompt).dialog('open');
}

function sessionExpired()
{
window.location.href = logoutUrl;
}
};

$.Autologout.defaults = {
sessionTimeout: 20,
sessionDialogWait: 1.5,
bgiframe: true,
pageSelector: null
};

})(jQuery);


Update: Note that I've added in the ability to specify a selector for your page content. In instances where the content is generated dynamically on the page, I've found that the dialog overlay can be too small for the generated content. If you specify a selector for an element that takes up the entire page, the overlay will be resized when the dialog is shown so that it covers all the content.

Sample implementation -- from my master page. Notice how I only include the code on the page if the request is authenticated. It shouldn't be run on any page that doesn't have an authenticated session, obviously.


<% if (this.Request.IsAuthenticated)
{
double sessionDialogWait = 1.5;
double sessionTimeout = 30;
if (ViewData["sessionTimeout"] != null)
{
sessionTimeout = Convert.ToDouble( ViewData["sessionTimeout"] );
}
%>
<%= Html.Javascript( Url.Content( "~/Scripts/autologout.js" ) ) %>

<script type="text/javascript">
$(document).ready( function() {
$('#sessionEndDialog').autologout( '<%= Url.Action( "About", "Home" ) %>', '<%= Url.Action( "Logout", "Account" ) %>', {
sessionTimeout : Number('<%= sessionTimeout %>'),
sessionDialogWait: Number('<%= sessionDialogWait %>')
});
});
</script>

<% } %>


...snip...


<div id="sessionEndDialog" title="Session Expiring" style="display: none;">
<p>
Your session is about to expire. Click OK to renew your session or Logout to logout
of the application.
</p>
</div>

Sunday, May 10, 2009

Tales of UI Mock ups

I'm not, or perhaps I should say, I wasn't a big fan of using tools for UI mock ups.

Most of the time I prefer to do my mockups on a whiteboard. Mocking up a UI on a whiteboard has several advantages. First, the client knows that it's not the real UI. It's amazing, to me anyway, how important that really is. The minute you have something that looks real, you start focusing the details of the interface. Early on, when the mock up is most useful, you don't want to spend much time worrying about the particular details -- how many pixels away from this input element the text is or the exact color of that background.

I find that it's helpful to draw a picture of how the interface might work when trying to explain my ideas of how it could work. My feeling is that making the UI mockup too real at this point runs the risk of changing the focus from the function of the application to the look of the application. Now, there are aspects of the interface that both strongly affect functionality and are driven by it. For example, drop down lists are excellent ways to present a small number of fixed choices to a user, but fixating on a drop down list can drive the design of the interface in ways that may not be appropriate if the number of potential inputs is very large. Knowing what you need to accomplish at this point is much more important that deciding how you are going to accomplish it. Conversely, once you know the parameters of what you are trying to accomplish, some of the UI interface components are constrained.

Second, I know that it's not the real interface. You may not have this problem, but I tend to be a perfectionist. For me, using a tool holds the temptation for me to start fixating on the details of the interface. I start worrying about the color scheme -- trying various combinations and shadings to get just the right look -- or spending time getting this particular element to line up with that one or center under another. Now there is a time to focus on that, assuming that it's important to the customer, but mock up time is probably not the time for this. I'd really prefer to get a version or two in front of the customer to use before I start spending a lot of time trying to perfect the look and feel.

Because I follow an agile philosophy, I expect that feedback on the early versions will drive the functionality and the interface in ways that we may not have expected when conceiving the initial application requirements. The further we get into development, the more stable the interface will, or should, become. Once the interface has stabilized it makes more sense to spend effort on getting the look and feel perfected. That's not to say that significant effort doesn't go into developing the interface, but I prefer that it be done as I'm developing the actual interface not the mock up. I prefer to use the mock up as a design guideline, not a finished product that needs to simply be translated into the application.

In addition, I really like the extremely low cost of using a whiteboard. I don't have to worry about access to the computer on my desk with the application. I don't have to spend a lot of time in advance preparing different versions, anticipating the possible the directions the feature discussion will take.

Unfortunately, there's one or two very big disadvantages to the whiteboard: it's hard to keep the artifacts you develop there in a format that is both permanent and modifiable. This is especially true if the whiteboard is not in your office. I often take pictures of the whiteboard and store them in my development wiki along with my stories, but I can only refer back to these. If I want to make changes, I need to redraw the mock up each time, take a picture, and store it. It's also very difficult to share a whiteboard, at least, a plain, ol' whiteboard, such as the ones we have in our office, with people who aren't in the same building.

I recently ran into a problem along this line with the jQuery slideshow I wrote about earlier. I wasn't happy with the location of my slideshow controls: centered over the top of the image. Whenever the image orientation or size change in the slideshow, the controls would move on the page. It was disconcerting to say the least. Rather than change the actual interface, I decided to mock up some alternatives to see how it would work visually before committing to changing code.

I could have done this on a whiteboard and, in the past, I probably would have. I decided to try out a new tool, however, that I had found out about on StackOverflow. That tool is Balsamiq Mockups from Balsamlq Studios. Balsamiq Mockups basically allows you to sketch out a user interface in a way that mimics a hand-drawn interface. You can save the interface, open it up again later, and modify it if you want. Balsamiq has versions of their tool for Confluence, Jira, and xWiki, as well as a desktop version.

I decided to download a copy of their desktop version and draw up my interface. Unfortunately, the trial version didn't include the ability to save and I didn't make a screenshot, but I was really pleased with how quickly I was able to mock up a look alike to the existing interface and make my control changes. Once I did I was able to see that the controls, now anchored in a 2x3 block on the upper left of the images, worked well visually. I went ahead with the changes and, more to the point, decided to convince my manager to try the version for Confluence, which I also use as a permanent extension of my development practices. I have a lot of hopes for Balsamiq Mockups. It seems to encompass the best features of hand-drawn mock ups - we can focus on the elements, not the details and there's not a lot of investment/cost to developing them -- and allows me to save and share them for later use.

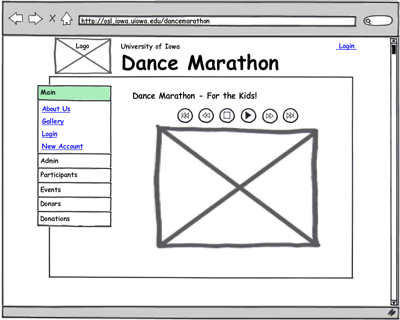
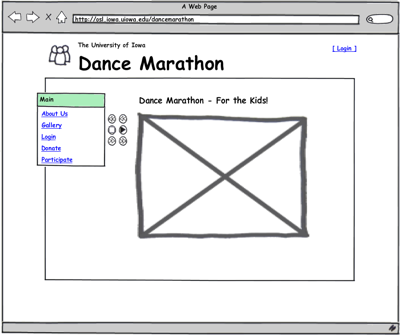
Below are a couple of mock ups developed with the trial version of the tool for Confluence. Neither of these took more than a few minutes to work up. They are embedded in the wiki with my development stories and available to the customer from the web. Notice how in the second mock up, I've replaced the image placeholder in the header with one of the standard icons. You can check out the actual interface at http://osl.iowa.uiowa.edu/dancemarathon for comparison.

Original Gallery


Updated Gallery Showing New Menu Item


We're still early in develop on this application so we haven't invested a lot in the public interface. The application is still mostly oriented toward the administrative functions required for managing the Dance Marathon event. I fully expect to get much more use out of the tool as we work on the Donor and other public parts of the application.

Tuesday, May 5, 2009

Auditing inserts and updates using LINQ to SQL

Any time you have an application where multiple people fill different roles in the application, you probably have a need to audit at least some of the changes that those people can make in your database. Sometimes this might be for security purposes; other times you may want to be able to quickly restore the state of a particular row or rows in the database. I often do auditing for these purposes. Recently I discovered another use, which undoubtedly others discovered before me, but it's sometimes helpful to provide notifications based on changes in the database. An audit log can provide the history for these types of triggers.

The application I'm currently working on, a tracking application for the Dance Marathon [not my site] student group at the Unversity of Iowa, has some of these auditing needs. Since I'm using LINQ to SQL as my ORM, I chose to implement my auditing code-side in submit changes. To this end, I created an AuditableDataContextBase class that derives from DataContext and will be the base class for my LINQ to SQL data context. The context has an CurrentUser property that holds the identity of the current user. This property is set in the factory method that creates my data context. AuditUser is actually pretty simple:

public class AuditUser
{
public int ID { get; set; }
public string Name { get; set; }

public AuditUser()
{
ID = 0;
Name = "system";
}

public AuditUser( Participant participant )
{
if (participant == null)
{
throw new ArgumentNullException( "participant" );
}
this.ID = participant.ParticipantID;
this.Name = participant.DisplayName;
}
}

The Participant class is my user entity class for the application.


The factory method that creates the data context is also pretty simple, although, it actually returns a wrapper around the data context. I described a little bit about the wrapper in my previous post. Because the "current user" depends on the context of the request and must make a call into the database to get a user entity to use in constructing the AuditUser object, intject a copy of the wrapper into the a utility method use to extract the user's identity from the web context and retrieve the appropriate entity from the database. Here's the interface and base class that does most of the work.

public interface ICurrentUserUtility
{
AuditUser GetAuditUser();
AuditUser GetAuditUser( IAuditableDataContextWrapper dataContext );
}

public abstract class CurrentUserUtilityBase : ICurrentUserUtility
{
private HttpContextBase WebContext;

protected CurrentUserUtilityBase( HttpContextBase httpContext )
{
this.WebContext = httpContext ?? (HttpContext.Current != null ? new HttpContextWrapper( HttpContext.Current ) : null);
}

public abstract AuditUser GetAuditUser();

public AuditUser GetAuditUser( IAuditableDataContextWrapper dataContext )
{
if (this.WebContext != null
&& this.WebContext.User != null
&& this.WebContext.User.Identity != null
&& this.WebContext.User.Identity != WindowsIdentity.GetAnonymous())
{
var participant = dataContext.Table<Participant>()
.Where( p => p.UserName == this.WebContext.User.Identity.Name )
.Select( p => new AuditUser { ID = p.ParticipantID, Name = p.DisplayName } )
.SingleOrDefault();
if (participant != null)
{
return participant;
}
}
return new AuditUser();
}
}

Each implementing class is associated with a particular data context type and thus I can have different utility classes for each data context. Note that because I'm implementing an interface I need not take advantage of the base class implementation and could have a utility that derived the user's identity from something other than the web context. This will be important later on when I have Windows services that perform updates on an automated basis so that I can inject a well-known id for auditing purposes. Here's the implementation for the data context that holds my user data.

public class CurrentUserUtility : CurrentUserUtilityBase
{

public CurrentUserUtility()
: this( null )
{
}

public CurrentUserUtility( HttpContextBase httpContext )
: base( httpContext )
{
}

public override AuditUser GetAuditUser()
{
IDataContextFactory factory = new MasterEventDataContextFactory();
using (IAuditableDataContextWrapper wrapper = factory.GetDataContextWrapper())
{
return GetAuditUser( wrapper );
}
}
}

The wrapper class encapsulates the actual data context and simply delegates actions to it (the wrapper exists to make the data context testable, so it's not very complicated). The interesting bit is in the base data context. The SubmitChanges method constructs an AuditUtility that does the actual auditing and uses the ChangeSet to know what it needs to audit. I want to audit both failure and success, so I catch any exceptions throw by the base SubmitChanges method and the presence or absence of the exception to determine whether the operation was successful. Once the changes have been made, methods on the AudityUtility are used to log the various types of changes from the ChangeSet.

public override void SubmitChanges( System.Data.Linq.ConflictMode failureMode )
{
using (AuditUtility auditor = new AuditUtility( this.CurrentUser ))
{
ChangeSet changes = this.GetChangeSet();

bool success = false;
Exception caughtException = null;
try
{
base.SubmitChanges( failureMode );
success = true;
}
catch (Exception e)
{
caughtException = e;
}

foreach (object deleted in changes.Deletes)
{
auditor.AuditEntity( deleted, ChangeAction.Delete, success );
}
foreach (object inserted in changes.Inserts)
{
auditor.AuditEntity( inserted, ChangeAction.Insert, success );
}
foreach (object updated in changes.Updates)
{
auditor.AuditEntity( updated, ChangeAction.Update, success );
}

if (caughtException != null)
{
throw caughtException;
}
}
}


The AuditUtility


Finally, we come to the class that actually creates the audit records, the AuditUtility. The AuditUtility works by using an AuditContextAttribute that decorates classes that need to be audited. It assumes that for each class so decorated, there is an [Audit.] table in the data context containing the audit entities. This audit class has the schema of the decorated class with the exception that the "id" parameter of the decorated class is not an auto-generated column and it has additional AuditID (primary key, identity column), ModifiedByID (int), ModifiedByName (varchar), ModifiedAt (datetime), Modification (varchar), and Success (bit) columns.

The AuditContextAttribute specifies both that the class is able to be audited and specifies the type of the audit entity to use. It gets applied to a partial class implementation for the entities that need to be audited.

[AuditContext( AuditType = typeof( Audit_Event ) )]
public partial class Event
{
...
}

internal class AuditContextAttribute : Attribute
{
public Type AuditType { get; set; }

private string tableProperty;
public string TableProperty
{
get
{
if (string.IsNullOrEmpty( this.tableProperty ))
{
this.tableProperty = this.AuditType.Name;
}
return this.tableProperty;
}
set { this.tableProperty = value; }
}
}

The AuditUtility class has a couple of utility methods. GetAuditContext is used to extract the AuditContextAttribute from an entity, if it exists. CopyColumns is used to copy the common columns, as indicated by the ColumnAttribute on the decorated entity class, from the decorated entity to the audit entity. The latter uses reflection over the public properties of the two classes. Note that we skip any timestamp columns. The timestamp column on the audit entity reflects its version, not the version of the decorated entity.

private AuditContextAttribute GetAuditContext( object entity )
{
return entity.GetType().GetCustomAttributes( typeof( AuditContextAttribute ), false )
.Cast<AuditContextAttribute>()
.SingleOrDefault();
}

private void CopyColumns( object from, object to )
{
if (from == null)
{
throw new ArgumentNullException( "from" );
}
if (to == null)
{
throw new ArgumentNullException( "to" );
}

var fromType = from.GetType();
var toType = to.GetType();

foreach (var fromProperty in fromType.GetProperties())
{
var attribute = fromProperty.GetCustomAttributes( typeof( ColumnAttribute ), false )
.Cast<ColumnAttribute>()
.FirstOrDefault();
if (attribute != null && !attribute.IsVersion)
{
var toProperty = toType.GetProperty( fromProperty.Name );
toProperty.SetValue( to, fromProperty.GetValue( from, null ), null );
}
}
}

The AuditUtility class has two constructors. The first is used by the actual code, the second by my unit tests. The second allows me to inject a fake data context which is useful for testing. Notice that the AuditUtility implements IDisposable, however, when the data context is passed in, we don't need or want to dispose of the injected context. My IDisposable implementation checks the NeedDispose property before it attempts to dispose of the AuditDataContext (the context containing the audit entities). When used normally, this context will be created by the utility and disposed when the Dispose method is called. Also notice that we always inject the current user, an AuditUser object. This object is used to set the ModifiedByID and ModifiedByName columns in the audit entity.

public AuditUtility( AuditUser currentUser )
: this( null, currentUser )
{
}

public AuditUtility( IDataContextWrapper auditDataContext, AuditUser currentUser )
{
this.CurrentUser = currentUser ?? new AuditUser();
if (auditDataContext == null)
{
this.AuditDataContext = new DataContextWrapper<MasterEventAuditingDataContext>();
this.NeedDispose = true;
}
else
{
this.AuditDataContext = auditDataContext;
}
}

Lastly, we have the method that pulls everything together, AuditEntity. This method takes the entity to audit, the action that was attempted, and the status of the action. It creates an appropriate audit entity for the entity being audited and populates its values based on the entity parameter. Each audit entity is required to implement IAuditEntity. Basically, IAuditEntity defines a method that is used to set the auditing properties on the entity. It would be nice to be able to provide this in a base class, unfortunately the properties that you need to modify belong to each LINQ-to-SQL designer generated class so they can't be put in a base class. The easiest thing to do is to violate DRY and repeat the code in each audit entity.

#region IAuditEntity Members

public void SetAuditProperties( int participantID, string participantName, ChangeAction action, bool success )
{
this.ModifiedAt = DateTime.Now;
this.ModifiedByID = participantID;
this.ModifiedByName = participantName;
this.Modification = Enum.Format( typeof( ChangeAction ), action, "g" );
this.Success = success;
}

#endregion

The method defined by IAuditEntity is used in conjuntion with the private helper methods to make the audit entity and store it using the AuditDataContext.

public void AuditEntity( object entity, ChangeAction action, bool success )
{

if (entity == null)
{
throw new ArgumentNullException( "entity" );
}

if (action != ChangeAction.None) // only audit inserts, deletes, and updates
{
AuditContextAttribute auditContext = GetAuditContext( entity );
if (auditContext != null)
{
var auditTable = this.AuditDataContext.Table( auditContext.AuditType );
if (auditTable != null)
{
try
{
IAuditEntity auditEntity = Activator.CreateInstance( auditContext.AuditType ) as IAuditEntity;
if (auditEntity != null)
{
CopyColumns( entity, auditEntity );
auditEntity.SetAuditProperties( this.CurrentUser.ID, this.CurrentUser.Name, action, success );
auditTable.InsertOnSubmit( auditEntity );
this.AuditDataContext.SubmitChanges();
}
}
catch { }
}
}
}
}
Alternative IAuditEntity (Updated)


As an alternative you might want to define the audit properties (ModifiedAt, ...) on the IAuditEntity interface and define the SetAuditProperties() method as an extension on IAuditEntity. This way you can define the method just once -- as long as you want it to work the same way for all audited entities. All of your additional audit properties will need to be the same for all audit entities. In practice I have found this to be the case, however, and I now define set up my auditing this way.
public interface IAuditEntity
{
int ModifiedByID { get; set; }
string ModifiedByName { get; set; }
string Modification { get; set; }
bool Success { get; set; }
}


public static class AuditEntityExtensions
{
public static void SetAuditProperties( this IAuditEntity source, int modifiedByID, string modifiedByName, ChangeAction action, bool success )
{
source.ModifiedByID = modifiedByID;
source.ModifiedByName = modifiedByName;
source.Modification = Enum.Format( typeof( ChangeAction ), action, "g" );
source.Success = success;
}
}

Some Final Notes


In order to make sure that the audit records stay intact, as a final measure, I add triggers to each of the audit tables that run on UPDATE and DELETE. These triggers simply rollback the transaction. This prevents my application and any users from removing or changing the audit records accidentally. For my integration tests, I do disable the triggers so that the test data can be removed from my test database instance.


I'd be interested in hearing your solutions to the same or similar problems. Eventually, I may need to add select/read auditing to the application as well. Unfortunately, I haven't been able to think a way to do this except by implementing the OnLoad partial method in each of my entity classes. To do insert/update/delete auditing the only change to my entities is to decorate them with the AuditContextAttribute. Doing select/read auditing will require more intrusive methods I'm afraid.

Sunday, April 26, 2009

Adventures in mocking and faking the LINQ to SQL data context

Andrew Tokeley has an excellent blog post on mocking the LINQ to SQL data context, as implemented by his friend Stuart Clark. I've made heavy use of the code he posted in developing my own data context wrapper. In the process of testing my ASP.NET MVC application, though, I've found that a few enhancements can make this concept even more effective.

Faking Data

Clark's DataContextWrapper makes it possible to mock the LINQ to SQL data context. This is a tremendous advantage when developing unit tests that make use of the data context. Andrew's implementation is, however, more of a fake implementation rather than a mock. A fake implementation implements the same interface, but uses a simpler mechanism to accomplish the same tasks. A mock implementation, on the other hand, does not attempt to actually perform the same actions, but simply pretends to. Another difference is that the mock implementation typically tracks calls to its methods so that they can be verified, whereas a fake implementation is typically a simple stand-in for the actual implementation.

I decided early on, though, that I wanted to fake the data in addition to mocking the data context so this was actually ideal for me. Because so much of my application interacts with the database, I wanted to be able to use a DataContextWrapper that acted as much like the real database as possible. My feeling is that using a fake database would make it conceptually easier to write tests as if I were directly interacting with the database without having to consider all of the interactions that would go on under the hood. I suspect that there are many who would disagree with me, but I find that I work better with this model. One advantage is that I can simply reuse the fake data over and over again, yet when necessary I can still mock the DataContextWrapper, for example when I need one of its methods to throw an exception. When faking data I found that the fake implementation of the DataContextWrapper needed a few tweaks to make it really usable.

Inserting Data

The fake DataContextWrapper, as implemented by Stuart, adds the entity in the InsertOnSubmit method. However, the real LINQ To SQL data context doesn't insert the data into the database until SubmitChanges is called. Since I wanted my fake context to work as much like the real context as possible, I decided to implement a mechanism to keep track of the inserted data until SubmitChanges is called rather than add the entity to the fake table implementation during InsertOnSubmit. Likewise, it doesn't make much sense to use a relational database unless your data is related. Nearly all applications have entities that are related to each other. LINQ to SQL implements this using EntityRef (for one-to-one relationships) and EntitySets (for one-to-many relationships). The natural way to add related data in LINQ to SQL is to add it to the EntityRef or EntitySet representing the association.

   var context = new DataContextWrapper&lt;MyDataContext&gt;();
var masterEntity = new MasterEntity { ... };
masterEntity.RelatedEntities.Add( new RelatedEntity { ... } );
context.InsertOnSubmit( masterEntity );
context.SubmitChanges();


Without some special consideration, though, a mock DataContextWrapper doesn't support adding new related entities this way. I found myself writing code like this, instead, to pass my tests.

   var context = new DataContextWrapper&lt;MyDataContext&gt;();
var masterEntity = new MasterEntity { ... };
var relatedEntity = new RelatedEntity
{
MasterEntity = masterEntity,
...
}
masterEntity.RelatedEntities.Add( relatedEntity );
context.InsertOnSubmit( masterEntity );
context.InsertOnSubmit( relatedEntity );
context.SubmitChanges();

Note the difference between an actual context and the wrapper's implementation of InsertOnSubmit. I highly prefer the wrapper's implementation.


Clearly, to get the code I wanted, I needed to make my fake DataContextWrapper be able to detect when a newly inserted entity has related data and insert it as well. This would enable me to pass my tests without having to write extra code for the fake implementation. In order to do this I search the related entities for each of the entities stored in the fake tables for entities that are not in the appropriate table. These entities get added to the set of entities that need to be inserted into the fake implementation during the insert phase of SubmitChanges.

To do this I need a few helper methods for my FakeDataContextWrapper. These methods will iterate through an object's referenced objects and, if they aren't already in the fake data, schedule them to be added during the insert phase of SubmitChanges.


private void AddReferencedObjects( object entity )
{
foreach (var set in GetEntitySets( entity ))
{
foreach (var item in set)
{
if (!this.mockDatabase.Tables[item.GetType()].Contains( item ))
{
this.Added.Add( item );
}
}
}
foreach (var reference in GetEntityRefs( entity ))
{
if (!this.mockDatabase.Tables[reference.GetType()].Contains( reference ))
{
this.Added.Add( reference );
}
}
}

private IEnumerable<IEnumerable> GetEntitySets( object entity )
{
foreach (var property in entity.GetType().GetProperties())
{
if (property.PropertyType.Name.Contains( "EntitySet" ))
{
var value = property.GetValue( entity, null );
yield return value as IEnumerable;
}
}
}

private IEnumerable<object> GetEntityRefs( object entity )
{
foreach (var property in entity.GetType().GetProperties())
{
if (property.PropertyType.Name.Contains( "EntityRef" ))
{
yield return property.GetValue( entity, null );
}
}
}

Then we add a few lines of code to our SubmitChanges implementation to take care of actually updating the fake data when entities are added/updated/deleted. Notice how we make sure that all of the new objects to be inserted get added before the insert phase. The phases run, in order, insert, delete, update -- though one could probably switch the first two. As of yet, though, we don't have any need to address updates.


var directlyAdded = new List<object>( this.Added );
foreach (var obj in directlyAdded)
{
AddReferencedObjects( obj );
}

foreach (var list in this.mockDatabase.Tables.Values)
{
foreach (var obj in list)
{
AddReferencedObjects( obj );
}
}

foreach (var obj in this.Added)
{
this.mockDatabase.Tables[obj.GetType()].Add( obj );
}

this.Added.Clear();

foreach (var obj in this.Deleted)
{
this.mockDatabase.Tables[obj.GetType()].Remove( obj );
}

this.Deleted.Clear();
Validation

I decided to use Scott Guthrie's validation techniques on LINQ to SQL entities. To this end, I have a IValidatedEntity interface that my entities implement that defines a GetRuleViolations() method where my business rules are validated. In addition, I implement the OnValidate partial method, which calls GetRuleViolations to ensure that my entities are valid prior to saving them to the database. Unfortunately Andrew's mock context doesn't address the validation requirements. I decided to implement validation in the SubmitChanges method so that my fake DataContextWrapper would also perform validation just like the real context.

One issue that I ran into, however, is that the real data context tracks the changes that are made to existing entities so that it knows which ones need to be updated. It only updates those entities that have changed. Rather than add this complexity to the fake implementation, I decided instead to simply validate all entities as if they were being updated during the update phase of SubmitChanges. This incurs a little extra processing overhead for each unit test that touches code that does a SubmitChanges but the advantage is that the fake implementation is simpler.

I use reflection to find the OnValidate method for each entity and invoke it with the proper ChangeAction. Finally, in order to get the actual exception, instead of the exception thrown by the reflection calls, I wrap the entire SubmitChanges code in a try-catch block and throw the InnerException on errors.


public virtual void SubmitChanges( ConflictMode failureMode )
{
try
{
var directlyAdded = new List<object>( this.Added );
foreach (var obj in directlyAdded)
{
AddReferencedObjects( obj );
}

foreach (var list in this.mockDatabase.Tables.Values)
{
foreach (var obj in list)
{
AddReferencedObjects( obj );
}
}

foreach (var obj in this.Added)
{
MethodInfo validator = obj.GetType().GetMethod( "OnValidate",
BindingFlags.Instance | BindingFlags.NonPublic );
if (validator != null)
{
validator.Invoke( obj, new object[] { ChangeAction.Insert } );
}
this.mockDatabase.Tables[obj.GetType()].Add( obj );
}

this.Added.Clear();

foreach (var obj in this.Deleted)
{
MethodInfo validator = obj.GetType().GetMethod( "OnValidate",
BindingFlags.Instance | BindingFlags.NonPublic );
if (validator != null)
{
validator.Invoke( obj, new object[] { ChangeAction.Delete } );
}
this.mockDatabase.Tables[obj.GetType()].Remove( obj );
}

this.Deleted.Clear();

foreach (KeyValuePair<Type, IList> tablePair in this.mockDatabase.Tables)
{
MethodInfo validator = tablePair.Key.GetMethod( "OnValidate",
BindingFlags.Instance | BindingFlags.NonPublic );
if (validator != null)
{
foreach (var obj in tablePair.Value)
{
validator.Invoke( obj, new object[] { ChangeAction.Update } );
}
}
}
}
catch (TargetInvocationException e)
{
throw e.InnerException;
}
}

I've made a few other tweaks to the entire set of classes that support mocking the data context. I'll write about those later when I tackle automating auditing for LINQ to SQL.

Thursday, April 23, 2009

jQuery Cycle: Adding player controls to a slide show

I'm working on a web site for a local student organization, Dance Marathon, to help them track people who participant or donate to their fundraising activities. On the front page of the web site I have a slideshow that rotates through a series of photos from previous events. I'm using the jQuery Cycle plugin for this. I wanted to add some player controls so that the end user can control the operation of the slideshow.

The site uses the FamFamFam Silk icon set by Mark James, so I decided to use the control icons for my player controls. These icons are released and used under a Creative Commons Attribution 3.0 license. I highly recommend these icons.

I wanted to support the full range of player controls: Goto First Slide, Previous Slide, Stop Show, Play Show, Next Slide, and Goto Last Slide. Fortunately, the Cycle plugin allows me to pause and resume the slide show as well as choose a specific slide to show. Turns out that this is really all that is necessary to support those features. I also appreciate that the Silk icons include both blue and gray versions of the control icons. This allows me to give the user some visual feedback on which control is currently selected. By default the play control will be the active control on page load.

The Cycle plugin is very easy to set up. Simply create a DIV and assign it a class (or id). I used:


<div class="pics"><div>


Next generate the set of images that you want to include in your slideshow. I'm using ASP.NET MVC so I pass down an IEnumerable<ImageDescriptor>, where ImageDescriptor is a class containing Url and AltText properties for the images to include. This enumeration is produced in my controller by reading a specific subdirectory of my images directory.

public ActionResult Index()
{
ViewData["Title"] = "Home Page";
ViewData["Message"] = this.LocalStrings.WelcomeMessage;

List images = new List();
string homeImagePath = Server.MapPath( "~/Content/images/home-images" );
foreach (string imageFile in Directory.GetFiles( homeImagePath ))
{
string fileName = Path.GetFileName( imageFile );
string url = Url.Content( "~/Content/images/home-images/" + fileName );
images.Add( new ImageDescriptor { Url = url } );
}
return View( images );
}


Because my images are of different sizes, I decided to place the controls above the slideshow. The cycle plugin, by default, reserves enough space, by setting fixed width/height on the DIV, to show all of the slides. Since some of my images are oriented vertically and others horizontally, placing the controls below the slideshow would make it appear too far below the horizontal images. I'd prefer it below, so I'm still working on making this work for both orientations. If you have any ideas, let me know.

First, the view includes the player controls DIV so that they appear above the slideshow.

<div id="controls" class="hidden">
<img id="startButton"
src='<%= Url.Content( "~/Content/images/icons/control_start.png" ) %>'
alt="Beginning"
title="Beginning" />
<img id="prevButton"
src='<%= Url.Content( "~/Content/images/icons/control_rewind.png" ) %>'
alt="Previous"
title="Previous" />
<img id="stopButton"
src='<%= Url.Content( "~/Content/images/icons/control_stop.png" ) %>'
alt="Stop"
title="Stop" />
<img id="playButton" src='<%= Url.Content( "~/Content/images/icons/control_play_blue.png" ) %>'
alt="Play"
title="Play" />
<img id="nextButton"
src='<%= Url.Content( "~/Content/images/icons/control_fastforward.png" ) %>'
alt="Next"
title="Next" />
<img id="endButton"
src='<%= Url.Content( "~/Content/images/icons/control_end.png" ) %>'
alt="End"
title="End" />
</div>


Next I include the code to generate the gallery. This has been simplified from the actual code. Note that I make all but the first image hidden, as well as the player controls, when the page first loads in case Javascript is not enabled. This helps the page to downgrade gracefully if the user won't be able to use the gallery. Note that Image is my own HtmlHelper extension, although, I think that there is a similar one in MvcFutures. ParameterDictionary is also my own class, but it functions similar to RouteValueDictionary so you could use that instead.

<div class='pics'>
<% var klass = "";
foreach (ImageDescriptor image in Model)
{
var htmlOptions = image.HtmlOptions ?? new ParameterDictionary();
var url = Url.Content( image.Url );
%>
<%= Html.Image( url,
image.AltText,
htmlOptions.Merge( new { @class = klass } ))%>
<%
klass = "hidden";
}
%>
</div>


Finally, we come to the magic that makes it all work -- the Javascript code. We need to include jQuery and the Cycle plugin. These go in the header for the view. Note That I'm also using an HtmlHelper extension here to generate the script tags.

<%= Html.Javascript( Url.Content( "~/Scripts/jquery-1.3.2.min.js" ) ) %>
<%= Html.Javascript( Url.Content( "~/Scripts/cycle/jquery.cycle.all.min.js" ) ) %>


Remember that we want the controls positioned over the center of whatever image is displayed. The gallery div will be sized to fit the largest image, but the images may be of different sizes. I played with a number of different options, but finally decided to simply set the left margin of the player controls based on the image size and the size of the controls themselves. This is handled dynamically using the following function. This function will be set as the before callback on the Cycle plugin.

function positionControls( curr, next, options, forward )
{
if (controlWidth == 0)
{
$('#controls > img').each( function() {
controlWidth = controlWidth + $(this).width();
});
}
var nextWidth = $(next).width();
var leftMargin = (nextWidth - controlWidth) / 2;
if (leftMargin < 0) leftMargin = 0;
$('#controls').css( 'marginLeft', leftMargin + 'px' );
}


Also, remember that we want to have the clicked control highlighted as a visual indicator to the user. The easiest way to do this is to have the click handler for each of the controls set the image urls based on which control is clicked using the following function.

function iconSelected(img)
{
$('#controls > img').each( function() {
this.src = this.src.replace( /_blue/, '' );
});
img.src = img.src.replace( /.png$/,'_blue.png' );
}


Now to tie it all together, we remove the hidden class from all the elements, set up the Cycle plugin, and install the click handlers for the controls. Note that the Cycle plugin has native support for Previous and Next slide options, though it doesn't pause the show after advancing. We'll need to set up the other behaviors, however, and add some additional behavior to the Previous and Next controls.

I'm going to use the default fade effect for the Cycle plugin and set it up to use random display of the images. I'll precalculate the position of the last image in the set to use for the Goto Last Slide control. All controls, except, Play, will pause the slideshow after performing their respective behavior. Play simply resumes the show when clicked.

    var controlWidth = 0;
var lastImage = 0;
$(document).ready( function() {
$('#controls').removeClass('hidden');

var gallery = $('.pics');
gallery.cycle( { fx: 'fade',
random: true,
prev: '#prevButton',
next: '#nextButton',
before: positionControls } );

gallery.children('img').removeClass('hidden');

lastImage = gallery.children('img').size() - 1;
if (lastImage < 0) lastImage = 0;

$('#stopButton').click( function() {
gallery.cycle('pause');
iconSelected(this);
});
$('#playButton').click( function() {
gallery.cycle('resume',true);
iconSelected(this);
});
$('#prevButton,#nextButton').click( function() {
gallery.cycle('pause');
iconSelected(this);
});
$('#startButton').click( function() {
gallery.cycle('pause');
gallery.cycle(0);
iconSelected(this);
});
$('#endButton').click( function() {
gallery.cycle('pause');
gallery.cycle(lastImage);
iconSelected(this);
});
});


I'm pretty pleased with how this turned out, though I want to keep exploring options for position the player controls. It is disconcerting when they jump around as the image sizes change. Floating them left, though, looks odd to me. I'd love to hear your idea.